
Author: jacob hanslip

cooker

Bosch Oven Error Codes

Bosch Oven Error Codes

A Guide To Understanding Bosch Oven Error Codes And Solutions

We know how important it is to keep your Bosch oven running smoothly, especially where replacement parts can come at a high cost. If an error code appears, use our complete list of Bosch error codes to help diagnose the issue. If you need further expert advice, Zest’s Helpdesk team is always here to support you with all your home appliances.

Take a look at our appliance care page to learn more about our care plans – designed to give you peace of mind and expert support whenever you need it.

cooker (3)

Error Code Solution Description
E11 Clean the control panel with a dry cloth. Disconnect the appliance from the power supply by switching off the fuse in the fuse box and switch it back on after 10 seconds.

The touch keys are not operating properly. This may be due to condensation on the keyboard.

E and a number appears on the display Disconnect the appliance from the power supply by switching off the fuse in the fuse box and book a repair. Contact us about our Repair & Care option if your appliance is broken.

A malfunction has occurred. Note any error codes that may appear on the display.

E and a number appears on the display and the control beeps 1. Press any button to stop beeping. 2. Reset oven if necessary. 3. If the error code continues to show up, turn off the oven and contact us about our Repair & Care option if your appliance is broken.

This is a fault/error code.

Need To Take Action?

If you own a home appliance, from kitchen gadgets to home tech, our standard Appliance Care Plan helps keep your equipment running smoothly. If you notice any faults, don’t worry with the optional Repair & Care upgrade, we can have an engineer out to you quickly.

toolbox

Our Latest Articles

Whether you’re looking to buy new or need help with caring for existing appliances our experts are here to answer your questions with useful guides and articles.

See All Help & Advice

Continue reading

dishwasher

Samsung Dishwasher Error Codes

Samsung Dishwasher Error Codes

A Guide To Understanding Samsung Dishwasher Error Codes And Solutions

We know how important it is to keep your Samsung dishwasher running smoothly, especially where replacement parts can come at a high cost. If an error code appears, use our complete list of Samsung error codes to help diagnose the issue. If you need further expert advice, Zest’s Helpdesk team is always here to support you with all your home appliances.

Take a look at our appliance care page to learn more about our care plans – designed to give you peace of mind and expert support whenever you need it.

blog pages artwork 25

Error Code Solution Description
1E, LE, 1C, LC, LC1, 1 1C, 1 LC 1. Check for leaks. 2. Examine hoses. 3. Run an empty cycle: – If suds appear, excessive detergent or non-HE detergent may have been used. Continue running empty cycles until suds disappear. – If no suds appear but the error persists, further service is required. Contact us about our Repair & Care option if your appliance is broken.

Water is being detected where it shouldn’t be. Sensor may be faulty.

4C, 1 4C, nF, 4E – Ensure both hot and cold water supply hoses are connected to the correct inlets. – Open the water valves completely. – Check that the drain hose is inserted properly. – Inspect and clean debris from water filters if needed. – If the issue persists, contact us about our Repair & Care option if your appliance is broken.

Water is not entering the washer correctly.

4C2, 4E2, CE, 14C2, nF1 Match the cold supply to the cold inlet and hot supply to the hot inlet (blue to blue, red to red).

Supply hoses are swapped, connecting cold to hot and hot to cold.

nd, 5E, SE, 5C, SC, 1 5C Try replacing filter or unclogging- if this don’t work we highly recommend seeking professional assistance. Contact us about our Repair & Care option if your appliance is broken.

Electrical problems or clogged filters.

E2, bE2, 6E2, BE2*, 8E2* – Power off the washer. – Touch and work each button back and forth to release any jam. – If the issue persists, visit the Support Center for service. Note: Refer to your user manual for model-specific error code meanings.

A button on the panel is detected as stuck or continuously pressed.

9C1, 9C2, PF, 3E*, 2E, 9E1, 9E2, UC, 19C1, 19C2 – Confirm the washer is on its own circuit and not using an extension cord. – If the error persists, visit the Support Center for assistance. Note: Refer to your user manual for model-specific error code meanings.

Irregular electrical current or power failure.

dS, d5, FL, LO, L0, dE, dE1, dE2, dC*, dC1, dL, 1 dC, 1dC4, 1dC1 – Check that the latch is secure and the door is properly closed. – Remove any obstructions preventing closure. – For FlexWash models, ensure the rubber button by the upper washer latch is intact. If missing, service may be required. Contact us about our Repair & Care option if your appliance is broken.

The door is not securely closed or locked.

ER CE Restart the connection to Wi-Fi. Wiring might be damaged if the door has been removed. Contact us about our Repair & Care option if the issue persists.

Indicates defective wiring – electric noise (French door fridge freezer). 

HI Check if a Door Open alert is active or it has been active recently. Avoid leaving the door open for a long time. Has a power failure occured for a long time? Please note if this unit connected to the internet only recently. Have you recently loaded a lot of food into the compartment? Press any key on the UI and the display shows the highest temperature reached for 10 seconds, then set the temperature. If the issue isn’t solved after an hour, contact us about our Repair & Care option.

The temperature is too high in one of the compartments.

E01, E02, E03, E06, E07 Contact us about our Repair & Care option if your appliance is broken.

Indicates a sensor warning.

E08 This is not an appliance failure, this error helps to prevent damages to the compressor. The voltage needs to be increased back to required levels. If this warning continues, contact us about Our Repair & Care option.

Low voltage warning.

E10 Set the fridge temperature to a colder value or set to Super Cool. This shoudl remove the error code once the required temperature has been reached. Keep doors closed to improve the time taken to reach the required temperature. Empty the location at the front area of the air duct channel holes and avoid putting food close to the sensor. Contact us about our Repair & Care option if your appliance is broken.

The fridge compartment is not cold enough. 

Error code E10 is likely to occur after a long term power failure, or when hot food has been left in the fridge.

E11 Check if Super Cool mode is activated. Set the fridge temperature to a higher value. Check if vents are clear and not clogged. Contact us about our Repair & Care option if your appliance is broken.

The fridge compartment is too cold.

Need To Take Action?

If you own a home appliance, from kitchen gadgets to home tech, our standard Appliance Care Plan helps keep your equipment running smoothly. If you notice any faults, don’t worry with the optional Repair & Care upgrade, we can have an engineer out to you quickly.

toolbox

Our Latest Articles

Whether you’re looking to buy new or need help with caring for existing appliances our experts are here to answer your questions with useful guides and articles.

See All Help & Advice

Continue reading

dishwasher

Miele Dishwasher Error Codes

Miele Dishwasher Error Codes

A Guide To Understanding Miele Dishwasher Error Codes And Solutions

We know how important it is to keep your Miele dishwasher running smoothly, especially where replacement parts can come at a high cost. If an error code appears, use our complete list of Miele error codes to help diagnose the issue. If you need further expert advice, Zest’s Helpdesk team is always here to support you with all your home appliances.

Take a look at our appliance care page to learn more about our care plans – designed to give you peace of mind and expert support whenever you need it.

dishwasher (2)

Error Code Solution Description
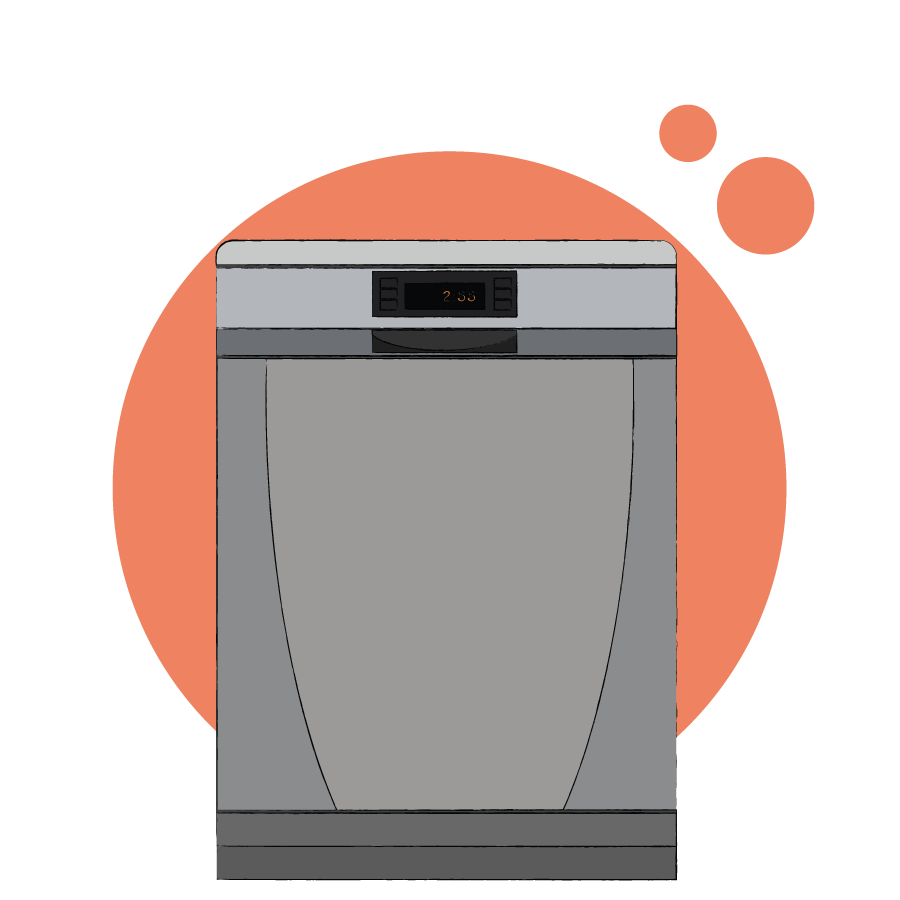
Automatic door opening (AutoOpen) is not functioning correctly. Select “AutoOpen”, “On,” in the “Settings” menu. Confirm with “OK”. AutoOpen is not activated in some programmes. If you have switched on AutoOpen and the door lock rail does not automaticall retract into the appliance, contact a professional. Cotnact us about our Repair & Care option.

The AutoOpen function is switched off.

F1 Contact us about our Repair & Care option if your appliance is broken.

Water/heating temperature sensor short circuited.

F2 Please contact us about our Repair & Care option.

Water/heating temperature sensor open circuited.

F11 (G 1xxx-G 6xxx) Contact us about our Repair & Care option if your appliance is broken.

The non return valve is incorrectly positioned in the dishwasher.

Fault F11 (G7 xxx & G5 xxx Discovery from year of manufacture 2019 onwards). Please contact us about our Repair & Care option.

The drain pump cover is positioned incorrectly in the dishwasher.

F12 (water inlet) Please contact us about our Repair & Care option.

The stopcock is not open or the inlet filter is soiled.

F13 (water inlet) Contact us about our Repair & Care option if your appliance is broken.

The stopcock is not open or the inlet filter is soiled. 

F14 Please contact us about our Repair & Care option if your appliance is broken.

The circulation pump is blocked. In longer breaks between wash/rinse cycles (lasting weeks or months at a time), the pump may become dry and stick together.

F14 Switch the dishwasher off. Wait a few seconds. Switch the dishwasher back on. Select the programme you want and start it. If the fault persists, please contact us about our Repair & Care option.

Technical fault. Water intake fault – pump pressure level switch or heating level switch.

F14 Ventilate the drain as described in the operating instructions for your dishwasher.

The on-site drainage connection is situated lower than the guide path for the lower basket rollers in the door. 

For example, in the case of a dishwasher installed at a height, the on-site drainage connection may be situated lower than the guide path for the lower basket rollers in the door.

F15 (water inlet) Open the stopcock.

The stopcock is not open.

F15 (water inlet) lease contact us about our Repair & Care option if your appliance is broken.

The inlet filter is soiled.

F15 (water inlet) Remove any kinks or loops from the water inlet hose. Keep an eye on these points for a while afterwards, as the plastic may weaken and the material may tear. In the event of any damage, the water inlet hose must be replaced. If this is necessary, contact us about our Repair & Care option.

The water inlet hose is kinked.

F15 (water inlet) Contact a plumber or the facility manager. If the fault persists after this, book a repair. Contact us about our Repair & Care option.

The flow pressure at the water connection is lower than 50 kPa (0.5 bar).

F18 Please book a repair. Contact us about our Repair & Care options.

Water intake valve defective.

F19 Please book a repair. Contact us about our Repair & Care options.

Flow meter defective.

F24 Please book a repair. Contact us about our Repair & Care options.

Heating relay contact fault.

F25 Please book a repair. Contact us about our Repair & Care options.

Desired temperature fault.

F26 Please book a repair. Contact us about our Repair & Care options.

Boiling protection.

F33 Please book a repair. Contact us about our Repair & Care options.

Door lock does not open.

F36 Please book a repair. Contact us about our Repair & Care options.

Door lock switch defective.

F38 Please book a repair. Contact us about our Repair & Care options.

Electronic module fault.

F40 Please book a repair. Contact us about our Repair & Care options.

Electronic module fault.

F42 Please book a repair. Contact us about our Repair & Care options.

Mains frequency registration fault.

F47 Please book a repair. Contact us about our Repair & Care options.

Electronic module fault.

F51 Please book a repair. Contact us about our Repair & Care options.

Pump pressure level switch fault.

F52 To remove the fault message, set the programme selector to Stop/End or, if you are using light touch switches, press and hold Start/Stop for around 5 seconds. Switch your appliance off and back on again. If you are using detergent tabs that already contain rinse aid, select the “Combi tab” function (if available). Do not use detergent tabs with the “Quick wash 40 deg. C” programme. If the fault persists, please book a repair. Contact us about our Repair & Care option.

Excess quantity of detergent or rinse aid dispensed.

F53 We recommend seeking professional advice. Contact us about our Repair & Care option.

Speed sensor fault.

F63 We recommend seeking professional advice. Contact us about our Repair & Care option.

Water path control unit fault.

F67 We recommend seeking professional advice. Contact us about our Repair & Care option.

Circulation pump fault.

F68 We recommend seeking professional advice. Contact us about our Repair & Care option.

Circulation pump fault.

F69 Remove the filter combination from the wash cabinet. Pour 1 litre of warm water (max 75 deg. C) with 3-5 drops of rinse aid into the dishwasher interior and let it soak for 5 minutes. Then start the programme again. Repeat this step 2-3 times.

The circulation pump is blocked.

F69 Switch the dishwasher off. Switch the dishwasher back on again after a few seconds. Select the desired programme using the Programme button. PRess the Start/Stop button. If the fault persists, please book a repair. Contact us about our Repair & Care option.

There may be a technical fault.

F70 (Waterproof system) Contact a professional. Contact us about our Repair & Care option if your appliance is broken.

The Waterproof system has been activated. The current programme is cancelled and te drain pump switches on.

F78 Please book a repair. Contact us about our Repair & Care option if your appliance is broken.

The circulation pump is blocked.

F78 Please book a repair. Contact us about our Repair & Care option if your appliance is broken.

There may be a technical fault.

F79 Please book a repair. Contact us about our Repair & Care option if your appliance is broken.

Circulation pump fault.

F84 Please book a repair. Contact us about our Repair & Care option if your appliance is broken.

Water intake fault.

F85 Please book a repair. Contact us about our Repair & Care option if your appliance is broken.

There is a technical fault.

F86 Close the salt reservoir flap. If the issue persists, please book a repair. Contact us about our Repair & Care option if your appliance is broken.

The salt reservoir flap in the door is not closed.

F87 Please book a repair. Contact us about our Repair & Care option if your appliance is broken.

There is a technical fault.

F88 Please book a repair. Contact us about our Repair & Care option if your appliance is broken.

Turbidity sensor fault.

F91 Please book a repair. Contact us about our Repair & Care option if your appliance is broken.

Load recognition inactive.

F170 Refill with rinse aid in plenty of time. Confirm with the OK button. If the fault persists, please book a repair. Contact us about our Repair & Care option if your appliance is broken.

Lack of rinse aid.

F171 Replecnish the salt at the end of the programme. Confirm with the OK button. If the issue persists, please book a repair. Contact us about our Repair & Care option.

Insufficient salt.

F172 Please book a repair. Contact us about our Repair & Care option.

There is a technical fault.

F173 Open the stopcock.

The water inlet is blocked or restricted.

F173 Please book a repair. Contact us about our Repair & Care option if your appliance is broken.

The inlet filter is soiled.

F173 Prioritise water intake for the dishwasher. Contact the facility manager or a plumber. If the issue persists, please book a repair. Contact us about our Repair & Care option if your appliance is broken.

The flow pressure at the water hose is too low.

F177 Clean the filters in accordance with the operating instructions. Press OK to confirm that the cleaning has been carried out. If the issue persists, please book a repair. Contact us about our Repair & Care option if your appliance is broken.

A predefined number of programme sequences have been started, you will receive a message telling you that the filter needs cleaning.

F179 Please book a repair. Contact us about our Repair & Care option if your appliance is broken.

Electronic module fault.

F594 Please book a repair. Contact us about our Repair & Care option if your appliance is broken.

Electronic module fault.

F595 Please book a repair. Contact us about our Repair & Care option if your appliance is broken.

Electronic module fault.

F600 (AutoDos: dispensing process outlet fault) Clean the spray arms. Clean the AutoDos system. If the issue persists, please book a repair. Contact us about our Repair & Care option if your appliance is broken.

The AutoDos system is blocked. 

F601 Check whether the PowerDisk holder and the PowerDisk have been fitted correctly: Clean the Miele AutoDos system. Activate the AutoDos function and restart the programme.

There is a fault in the AutoDos.

F607 Please book a repair. Contact us about our Repair & Care option if your appliance is broken.

The bottom spray arm is blocked or the nozzles of the bottom spray arm are clogged. The AutoDos function is automatically deactivated during the programme sequence because the AutoDos detergent outlet cannot be completely flushed out.

Need To Take Action?

If you own a home appliance, from kitchen gadgets to home tech, our standard Appliance Care Plan helps keep your equipment running smoothly. If you notice any faults, don’t worry with the optional Repair & Care upgrade, we can have an engineer out to you quickly.

toolbox

Our Latest Articles

Whether you’re looking to buy new or need help with caring for existing appliances our experts are here to answer your questions with useful guides and articles.

See All Help & Advice

Continue reading

washing machine

LG Washing Machine Error Codes

LG Washing Machine Error Codes

A Guide To Understanding LG Washing Machine Error Codes And Solutions

We know how important it is to keep your LG washing machine running smoothly, especially where replacement parts can come at a high cost. If an error code appears, use our complete list of LG error codes to help diagnose the issue. If you need further expert advice, Zest’s Helpdesk team is always here to support you with all your home appliances.

Take a look at our appliance care page to learn more about our care plans – designed to give you peace of mind and expert support whenever you need it.

washing machince

Error Code Solution Description
IE We recommend seeking professional advice. Contact us about our Repair & Care option if your appliance is broken.

A kink in the hose, clogged filters.

DE We recommend seeking professional advice. Contact us about our Repair & Care option if your appliance is broken.

A kink in the hose, clogged filter. 

UE Readjust the washign machine load to ensure it is balanced. If the issue persists, please contact an engineer. Contact us about our Repair & Care option if your appliance is broken.

Uneven load, sensor malfunction.

dE Check the door ot the machine is fully closed and there are no obstructions. If the issue persists, contact us about our Repair & Care option if your appliance is broken.

Door is open, the locking sensor is faulty.

tE, TE2, TE3, TE4 We recommend seeking professional advice. Contact us about our Repair & Care option.

Faulty heating element, malfunctioning thermostat.

FE Check whether the We recommend seeking professional advice. Contact us about our Repair & Care option.

Faulty water valve.

PE We recommend seeking professional advice. Contact us about our Repair & Care option.

A faulty pressure sensor, a clogged pressure hose, a malfunctioning control board. 

CE We recommend seeking professional advice. Contact us about our Repair & Care option.

A faulty motor, a malfunctioning control board.

LE We recommend seeking professional advice. Contact us about our Repair & Care option.

A faulty motor, a malfunctioning control board.

PF We recommend seeking professional advice. Contact us about our Repair & Care option.

Power outage, tripped fuse.

dHE We recommend seeking professional advice. Contact us about our Repair & Care option.

Malfunctioning heating element, control board issues, wiring problems.

AE We recommend seeking professional advice. Contact us about our Repair & Care option.

Damaged or faulty hoses, clogged drain pump.

EHE/ELE We recommend seeking professional advice. Contact us about our Repair & Care option.

Faulty heating element, thermistor issues, water supply issue.

Need To Take Action?

If you own a home appliance, from kitchen gadgets to home tech, our standard Appliance Care Plan helps keep your equipment running smoothly. If you notice any faults, don’t worry with the optional Repair & Care upgrade, we can have an engineer out to you quickly.

toolbox

Our Latest Articles

Whether you’re looking to buy new or need help with caring for existing appliances our experts are here to answer your questions with useful guides and articles.

See All Help & Advice

Continue reading

washing machine

Beko Washing Machine Error Codes

Beko Washing Machine Error Codes

A Guide To Understanding Beko Washing Machine Error Codes And Solutions

We know how important it is to keep your Beko washing machine running smoothly, especially where replacement parts can come at a high cost. If an error code appears, use our complete list of Beko error codes to help diagnose the issue. If you need further expert advice, Zest’s Helpdesk team is always here to support you with all your home appliances.

Take a look at our appliance care page to learn more about our care plans – designed to give you peace of mind and expert support whenever you need it.

washing machince (2)

Error Code Solution Description
E01 Inspect and replace faulty components. Contact us about our Repair & Care option if your appliance is broken.

Faulty mains board, Faulty NTC circuit.

E02 Check heater for faults. Contact us about our Repair & Care option if your appliance is broken.

Faulty heater, faulty main board.

E03 Inspect and replace heater relay if necessary. Contact us about our Repair & Care option if your appliance is broken.

Faulty relay or connections.

E04 Check inlet valve and replace if faulty. Contact us about our Repair & Care option if your appliance is broken.

Faulty inlet valve, faulty main board.

E05 Clear drain filter, inspect and replace drain pump faulty. Contact us about our Repair & Care option if your appliance is broken.

Clogged drain filter, faulty drain pump.

E06 Inspect door lock and switch, replace if needed. Contact us about our Repair & Care option if your appliance is broken.

Faulty door lock or door switch.

E07 Check for blockages in the drain, clear them and inspect pump for faults. Contact us about our Repair & Care option if your appliance is broken.

Clogged drain, faulty pump.

E08 Check and replace the temperature sensor or heating element as needed. Contact us about our Repair & Care option if your appliance is broken.

Faulty temperature sensor, faulty heating element.

E09 Inspect motor connections, replace if motor faulty. Contact us about our Repair & Care options if your appliance is broken.

Faulty motor, motor wiring issue.

E10 Ensure water inlet is clear, check and replace the valve if needed.Contact us about our Repair & Care option if your appliance is broken.

Blocked water inlet, faulty valve.

E11 Check the pressure switch, clear any blockages in the hose. Contact us about our Repair & Care option if your appliance is broken.

Faulty pressure switch, blocked hose. 

E12 Rearrange the load, redistribute evenly to avoid imbalance.

Excessive load, uneven distribution.

E13 Check the water level sensor and ensure hoses are clear.

Faulty water level sensor, blocked hose. 

E14 Inspect motor wiring and replace the motor if necessary. Contact us about our Repair & Care option if your appliance is broken.

Faulty motor, motor wiring issue.

E15 Check for leaks in hoses or drum, replace parts as needed. Contact us about our Repair & Care option if your appliance is broken.

Water leakage, faulty hoses.

Need To Take Action?

If you own a home appliance, from kitchen gadgets to home tech, our standard Appliance Care Plan helps keep your equipment running smoothly. If you notice any faults, don’t worry with the optional Repair & Care upgrade, we can have an engineer out to you quickly.

toolbox

Our Latest Articles

Whether you’re looking to buy new or need help with caring for existing appliances our experts are here to answer your questions with useful guides and articles.

See All Help & Advice

Continue reading

dishwasher

Bosch Dishwasher Error Codes

Bosch Dishwasher Error Codes

A Guide To Understanding Bosch Dishwasher Error Codes And Solutions

We know how important it is to keep your Bosch dishwasher running smoothly, especially where replacement parts can come at a high cost. If an error code appears, use our complete list of Bosch error codes to help diagnose the issue. If you need further expert advice, Zest’s Helpdesk team is always here to support you with all your home appliances.

Take a look at our appliance care page to learn more about our care plans – designed to give you peace of mind and expert support whenever you need it.

dishwasher

Error Code Solution Description
E01, E0100 and E2120 Reset power to breaker for 30 seconds. Contact us about our Repair & Care option if your appliance is broken.

There is a heat pump motor circuit fault at the main control board.

E02, E03, E0107, and E0103 Reset power to breaker for 30 seconds. Contact us about our Repair & Care option if your appliance is broken.

There is a main control board relay fault.

E04 and E0105 Please book a repair. Contact us about our Repair & Care option.

Your dishwasher has defected faulty heater electronics in the self test.

E05 and E0106 Reset the power breaker for 30 seconds. Contact us about our Repair & Care option if your appliance is broken.

There is a wash arm diverter circuit in the main control board fault/error.

E06 and E8000 Reset the power breaker for 30 seconds. If not resolved, please contact us about our Repair & Care option.

There is a door sensor circuit fault/error.

E07 and E2130 Reset the power breaker for 30 seconds. Contact us about our Repair & Care option if your appliance is broken.

The Zeolite (Crystal Dry) fan motor is defective.

E09 Reset the power breaker for 30 seconds. Contact us about our Repair & Care option if your appliance is broken.

There is a heat pump internal heater fault/error.

E10 and E2120 Reset the power breaker for 30 seconds. Contact us about our Repair & Care option if your appliance is broken.

There is a Zeolite (Crystal Dry) chamber heater fault/error. 

E12 and E2060 The dishwasher needs to be descaled. The Bosch descaler can be used to descale your dishwasher. To help avoid the issue in the future, use softening salt in your dishwasher if it comes with a water softener function.

There is limescale build up in the heat pump. 

Dishwashers are used on a regular basis which means that limescale can build up quickly, especially in hard water areas. To help your dishwasher work effectively and efficiently, regular descaling is important.

E14 and E3000 Contact us about our Repair & Care option if your appliance is broken.

There is a flow meter failure or an issue with water flowing into the dishwasher or the filling system.

E15 and E3100 Please turn off the water inflow and book a repair. Contact us about our Repair & Care option.

The safety switch has detected water in the base of the dishwasher. Your leakage protection system has been activated.

E16, E17, E3300, and E3400 Check the inlet hose to make sure it isn’t kinked or damaged. For further assistance contact us about our Repair & Care option.

There is an issue with water flowing into the dishwasher or the filling system. The water may not be able to enter the dishwasher.

E18 and E3200 Reset the power breaker for 30 seconds. Contact us about our Repair & Care option if your appliance is broken.

There is an issue with water flow into the dishwasher. The water level is too low, or water is not being pumped correctly.

E19 Reset the power breaker for 30 seconds. Contact us about our Repair & Care option if your appliance is broken.

There is a detergent dispenser solenoid fault/error.

E20 and E2030 Reset the power breaker for 30 seconds. Contact us about our Repair & Care option if your appliance is broken.

There is a heat pump internal heater fault/error.

E20 and E6002 Reset the power breaker for 30 seconds. Contact us about our Repair & Care option if your appliance is broken.

The heat pump is blocked.

E22 and E9240 Please book a repair. Contact us for our Repair & Care option.

The dishwasher filter is blocked. The filter is the area where food particles get caught and it needs to be cleaned out regularly. 

E23 and E6101 Contact us about our Repair & Care option if your appliance is broken.

There is an issue with the drain pump. This happens when the drain pump is clogged, blocked or faulty.

E24 and E6103 Check the inlet hose and make sure it’s not kinked or damaged. The pump cover may be loose. The pump cover is located at the bottom of the dishwasher underneath the filter. Remove the filter to reveal the pump cover and ensure it’s not loose. If you have trouble locating it, review your owner’s manual. If the dishwasher drain hose is connected to a garbage disposal’s dishwasher drain connection, ensure that the plug is removed from the disposer’s dishwasher drain connection.

The dishwasher is not draining properly due to the drain filter being blocked.

E25 and E6102 Reset the power breaker for 30 seconds. Contact us about our Repair & Care option if your appliance is broken.

the drain pump is blocked or the drain pump cover is loose or missing.

E27 and E9001 Reset the power breaker for 30 seconds. Contact us about our Repair & Care option if your appliance is broken.

The house power supply to the unit is too low.

E0110 Contact us about our Repair & Care option if your appliance is broken.

Failure causing electronics miscommunication.

E6160 Contact us about our Repair & Care option if your appliance is broken.

PowerControl (Controlled Lower Spray Arm) reference position not found.

E6900 Reset the power breaker for 30 seconds. Contact us about our Repair & Care option if your appliance is broken.

There is a detergent dispenser solenoid circuit fault/error.

H01 To delete timer programming, press the [4] + or – button until h:00 is displayed on the digital display.

This is not an actual error code, but an indication that the start up timer menu has been accessed to delay the start of the cycle, with H01 for a 1 hour delay, H02 for a 2 hour delay and so on.

Need To Take Action?

If you own a home appliance, from kitchen gadgets to home tech, our standard Appliance Care Plan helps keep your equipment running smoothly. If you notice any faults, don’t worry with the optional Repair & Care upgrade, we can have an engineer out to you quickly.

toolbox

Our Latest Articles

Whether you’re looking to buy new or need help with caring for existing appliances our experts are here to answer your questions with useful guides and articles.

See All Help & Advice

Continue reading

dishwasher

AEG Dishwasher Error Codes

AEG Dishwasher Error Codes

A Guide To Understanding AEG Dishwasher Error Codes And Solutions

We know how important it is to keep your AEG dishwasher running smoothly, especially where replacement parts can come at a high cost. If an error code appears, use our complete list of AEG error codes to help diagnose the issue. If you need further expert advice, Zest’s Helpdesk team is always here to support you with all your home appliances.

Take a look at our appliance care page to learn more about our care plans – designed to give you peace of mind and expert support whenever you need it.

Don’t forget, whenever you are cleaning, maintaining or repairing an appliance, make sure it is unplugged from the socket in the interest of safety. 

dishwasher (3)

Error Code Solution Description
E1 Try to unblock the water intake, or check your water pressure. If you can’t fix this, contact us about our Repair & Care option.

Tap is not open or water intake is restricted or water pressure is too low.

E2 Contact us about our Repair & Care option if your appliance is broken.

Malfunction with the heating element or a water temperature sensor.

E3 Have a professional come and take a look. Contact us about our Repair & Care option if your appliance is broken.

The dishwasher is filling with water but not heating it.

E4 Contact us about our Repair & Care option if your appliance is broken.

Issue with draining system.

E10 Contact us about our Repair & Care option if your appliance is broken.

Water intake problem.

E11 Contact us about our Repair & Care option if your appliance is broken.

Water inlet issue (kinked or blocked hose etc). 

Cycle indicator light is flashing Cancel the previous cycle. If the issue persists, contact us about our Repair & Care option.

Previous cycle needs to be cancelled.

Beeps 3 times or the LED flashed 3 times Check for the source of the leak, if you cannot remedy yourself, contact us about our Repair & Care option.

Indicates a leak, water collected at the bottom of the appliance.

AL5 Check the water inlet, you might need a professional to pay a visit. If you need an engineer, contact us about our Repair & Care options.

Beeps once or warning light flashes once. Indicates a water inlet problem.

C1 Check the water inlet, you might need a professional to pay a visit. If you need an engineer, contact us about our Repair & Care options.

Beeps once or warning light flashes once. Indicates a water inlet problem.

F1 Check the water inlet, you might need a professional to pay a visit. If you need an engineer, contact us about our Repair & Care options.

Beeps once or warning light flashes once. Indicates a water inlet problem.

i10 Check the water inlet, you might need a professional to pay a visit. If you need an engineer, contact us about our Repair & Care options.

Beeps once or warning light flashes once. Indicates a water inlet problem.

i11 Check the water inlet, you might need a professional to pay a visit. If you need an engineer, contact us about our Repair & Care options.

Beeps once or warning light flashes once. Indicates a water inlet problem.

C2 Check the water outlet isn’t blocked and clear it if it is. If the issue persists, you need an engineer. Contact us about our Repair & Care option.

Beeps twice, or the light flashes 2 times. Indicates the water doesn’t drain properly.

F2 Check the water outlet isn’t blocked and clear it if it is. If the issue persists, you need an engineer. Contact us about our Repair & Care option.

Beeps two times or light flashes 2 times. Dishwasher does not drain the water properly.

i20 Check the water outlet isn’t blocked and clear it if it is. If the issue persists, you need an engineer. Contact us about our Repair & Care option.

Beeps two times or light flashes 2 times. Dishwasher does not drain the water properly.

AL6 Check the water outlet isn’t blocked and clear it if it is. If the issue persists, you need an engineer. Contact us about our Repair & Care option.

Beeps two times or light flashes 2 times. Dishwasher does not drain the water properly.

i30 Reset the dishwasher by turning it off or unplugging it, waiting 2 minutes and turning it back on or plugging it back in.

Dishwasher needs resetting.

i40 Reset the dishwasher by turning it off or unplugging it, waiting 2 minutes and turning it back on or plugging it back in.

Dishwasher needs resetting.

i43, i44 Reset the dishwasher by turning it off or unplugging it, waiting 2 minutes and turning it back on or plugging it back in.

Dishwasher needs resetting.

i50, i51, i52, i53, i54, i55, i56, i57, i58, i59, i5A, i5B, i5C, i5D, i5E, i5F, i60, i80, iC0, iCo, iC1, iC2, iC3 Reset the dishwasher by turning it off or unplugging it, waiting 2 minutes and turning it back on or plugging it back in.

Dishwasher needs resetting.

iF0, iFo, iF1 Reset the dishwasher by turning it off or unplugging it, waiting 2 minutes and turning it back on or plugging it back in. Alternatively, check the water supply is working.

Dishwasher needs resetting & water supply needs to be checked.

Need To Take Action?

If you own a home appliance, from kitchen gadgets to home tech, our standard Appliance Care Plan helps keep your equipment running smoothly. If you notice any faults, don’t worry with the optional Repair & Care upgrade, we can have an engineer out to you quickly.

toolbox

Our Latest Articles

Whether you’re looking to buy new or need help with caring for existing appliances our experts are here to answer your questions with useful guides and articles.

See All Help & Advice

Continue reading

The Pros and Cons of Using a Bread Maker

The Pros and Cons of Using a Bread Maker

One often overlooked appliance is a bread maker. If you’re considering buying a bread maker, stick around and read our list of pros and cons!

The Pros and Cons of Using a Bread Maker

Homemade bread can be a tiresome and long process and, in some cases, not always successful. A bread machine alleviates the stress of regular baking, allowing you to place all the ingredients into the appliance at one time and return after a few hours to a freshly baked loaf.

The Pros of Using a Bread Maker

Cheaper Overall

Making your own bread works out considerably cheaper than buying a loaf, meaning you can get a much better-quality loaf of bread for less. According to White River Kitchens, it works out around 30-50 pence per loaf.

No Knead to Stress

Everyone knows how long the process of kneading dough is and, quite frankly, it’s one of the main reasons people avoid baking their own bread. A bread maker takes this inconvenience away from you, using its paddles to knead bread in no time, so you can simply sit back and relax, letting the appliance do its job.

Healthier Options

Using a bread maker means you’ll know exactly what you’ve put into your bread, unlike store-bought alternatives which can be pumped full of synthetic additives.

Convenient Clean Up

When it comes to cleaning up, a bread maker is as simple as it can get. Simply wash the bread pan, and you’re finished. Yes – it’s really that easy.

The Cons of Using a Bread Maker

Fixed Paddles

One disadvantage of using a bread maker as opposed to your hands is that the paddles are typically fixed, meaning they remain in the dough when baking, often leaving a hole in the middle of the loaf. Whilst this is not the biggest hinderance, it can be an annoyance to those who aim for gold standard loaves.

One By One

In a conventional oven, you can cook several loaves at once – great for batch baking or larger families. However, a bread maker limits you to one loaf per bake, which can be time-consuming when you’re looking to bake numerous loaves.

Our Latest Articles

Whether you’re looking to buy new or need help with caring for existing appliances our experts are here to answer your questions with useful guides and articles.

See All Help & Advice

Continue reading

fridge

Beko Fridge Error Codes

Beko Fridge Error Codes And Solutions

A Guide To Understanding Beko Fridge Error Codes And Solutions

We know how important it is to keep your Beko fridge running smoothly, especially where replacement parts can come at a high cost. If an error code appears, use our complete list of Beko error codes to help diagnose the issue. If you need further expert advice, Zest’s Helpdesk team is always here to support you with all your home appliances.

Take a look at our appliance care page to learn more about our care plans – designed to give you peace of mind and expert support whenever you need it.

fridge (2)

Error Code Solution Description
E0 Remove the inside rear panel of the freezer to access the sensor. Disconnect the sockets and test with a multimeter. If you see OL on the multimeter, then the sensor is open circuit. Buy a new sensor and test it to be sure it’s not reading as an open circuit. Get a new one and remount the back panel of the freezer. If the issue persists, please contact us about our Repair & Care option.

Freezer sensor failure.

E1 Contact us about our Repair & Care option if your appliance is broken.

Freezer defrost sensor failure.

E3 Contact us about our Repair & Care option if your appliance is broken.

Fridge sensor failure. 

E4 The defrost heater is not heating enough to defrost ice or is not working at all if you see this error code. Contact us about our Repair & Care option if your appliance is broken.

Defrost heater failure.

E8 Change the sensor or have a professional fix it for you. We recommend you contact us about our Repair & Care option if your appliance is broken.

Ice sensor failure.

E9 Check whether the appliance isReplace the ice maker or have a professional fix it for you. We recommend contacting us about our Repair & Care option if your appliance is broken.

Ice machine failure.

2 Contact us about our Repair & Care option if your appliance is broken.

Cooling fault. Refrigerant leakage, compressor malfunction, fan failure in the refrigerator, improper sensor operation, or the door has been open for a long time.

3 Replace the heater or the sensor of the refrigerator to fix this. We recommend you contact us about our Repair and Care option if your appliance is broken.

Heater fault. The heaters do not work or the do not work at full capacity, the refrigerator sensor must be repaired.

4 There could be a problem with the wire connections or the sensor has shifted. Contact us about our Repair & Care option if your appliance is broken.

The sensor circuit is open. One of the sensors is not installed in place, a defect in the wires, or a bad contact on the connectors. 

5 Contact us about our Repair & Care option if your appliance is broken.

Sensor short-circuit. Malfunction of the sensor, defect of the wires connecting one of the 3 temperature sensors with the control board, or poor contact in the connectors. 

6 Clean/replace the buttons.

The button is pressed. Faulty buttons or dirty buttons.

7 Check for a leakage of refrigerant, circulation system blockage or a faulty compressor. Contact us about our Repair & Care option if your appliance is broken.

Malfunction of the compressor. Compressor does not work, refrigerant leaks, or a blockage of the circulation system.

12 Contact us about our Repair & Care option if your appliance is broken.

Switch circuit fault. Bad contact on the switch, in the places of connecting wires to the control board or switch, or high resistance of the wires.

Need To Take Action?

If you own a home appliance, from kitchen gadgets to home tech, our standard Appliance Care Plan helps keep your equipment running smoothly. If you notice any faults, don’t worry with the optional Repair & Care upgrade, we can have an engineer out to you quickly.

toolbox

Our Latest Articles

Whether you’re looking to buy new or need help with caring for existing appliances our experts are here to answer your questions with useful guides and articles.

See All Help & Advice

Continue reading

Microwave Buyer’s Guide

Microwave Buyer’s Guide

If you’re looking to buy a new microwave, then check out our article on tips for your search! 

fridge

Buying a Microwave: All You Need to Know

Invented in 1946, the microwave has become the staple of the home, allowing for quick defrosting and cooking of food. It really is one of the most versatile appliances you’ll ever own. As fantastic as microwaves are, there are so many options on the market at various price points that it can quickly become a difficult task to buy one. We’ve put together a handy buyers guide below to help you on your way.

Types of Microwave


Standard Microwave

Sometimes known as ‘solo’ microwaves, these appliances are good for basic heating a defrosting tasks and are much cheaper than their more complicated counterparts. They also tend to be a little smaller, saving valuable space in the kitchen. The main downside of a standard microwave is that they can only heat food and can’t crisp or brown your food like you might get with a regular oven.

Microwave With Grill

Microwaves with a grill do everything that a standard microwave would do but, you guessed it, with the added ability to grill! This allows the option of searing & cooking meats at the same time as microwaving it, keeping the flavour and structure intact.

Combination Microwave

Sometimes known as a ‘convection’ microwave, these are the most versatile types of microwave available. Not only will it do what a standard microwave and grill microwave will do but it also circulate air and heat effectively to allow for baking food in it.

What Specifications Should Your Be Looking For?


Capacity

The capacity of microwaves tends to be anywhere from 15 litres to over 32 litres. As a rule of thumb, we would recommend looking for a microwave of over 25 litres, but it’s the size of the turntable itself and the interior height that are more important than the overall capacity. We’ve broken down some of the size differences below:

15 to 20 litres: This tends to be the standard solo microwave size so the choice at this capacity is going to be high. If you’re only using the microwave for basic reheating and defrosting then you should be absolutely fine but larger families with greater needs from a microwave should steer away from this size.

21 to 30 litres: In this capacity range, you should start to see grill and combination microwaves. The larger capacity makes them perfect for more complicated uses and for cooking larger foods. These sizes would be ideal for small families of two to four people in a household.

25 to 30 litres: At this range you’ll start to see a solid range of all three types of microwave available but with enough capacity to heat, defrost and cook large portions of food. You’ll also start to see a higher amount of ‘flatbed’ microwaves (see below for more details) which will give you more room to work with.

32 litres and above: These types of microwaves not only give you the flexibility to buy all three types but they’ll be large enough to cater to the demands of a four to six person household and the large portions of food that go along with it.

Microwave Prices


  • On a tight budget (Approx. £40 – £80): Simple solo microwaves, lower wattage (700-800W), basic controls (dial/buttons), smaller capacity (around 20L).
  • Mid-Range (Approx. £90 – £200): Higher power (800-1000W+), larger capacity (20-25L), added features like grill functions, digital displays, or basic convection.
  • High-End/Combination (Approx. £200 – £400+): Inverter technology, full convection ovens, steam functions, large capacities (25L+), sleek designs, built-in options, and premium brands.
  • Built-In Units (From £300+): Designed to fit seamlessly into cabinetry, often offering high power and features, priced significantly higher. 

Size


The internal capacity of the microwave doesn’t always equate to the overall size of the appliance. Make sure you measure the space available on your countertop or integrated space to ensure that the microwave you buy will fit properly.

Power


Microwave power is measured in ‘watts’ and the higher the wattage, the more power the microwave has and the quicker it will cook food. Wattages for microwaves range anywhere between 650W and 1950W, the majority of which being around the 800W range. When shopping around for a new microwave, you might want to look for ‘variable power levels’, allowing the appliance to cook at different power settings for different uses e.g., cooking vs defrosting.

Turntable or Flatbed?


Most microwaves will have a rotating turntable inside of them, typically made of glass. This rotates the food as its cooking to ensure its cooked evenly. Some microwaves on the more premium end of the price spectrum won’t have this turntable. Instead, they have different technology that evenly distributes heat without the use of a turntable which makes them easier to clean and it gives them more space on the inside.

Pre-programmed Settings


Microwaves with pre-programmed settings make it simpler to cook your favourite meals. Sometimes there will be exact settings for certain meats or dishes. Other microwaves will allow you input the weight and type of dish you’re heating and the microwave will optimise the way it cooks it accordingly.

Sensor Cooking


Some microwaves will have in built sensors for detecting moisture in food and monitoring the humidity of the microwave itself. This helps the microwave to adjust the power levels whilst it’s cooking something to make sure your food won’t dry out.

Multi-step Programming


Some more premium microwaves will come with ‘multi-step programming’ which allows you to cook things in a particular sequence without coming back to the microwave and starting it again. For example, defrosting food before initiating the cooking cycle.

Touch Panels


Some newer microwaves will come with digital touch panels that are easier to clean and easier to use than buttons and knobs. There are a handful that will come with a full digital touch screen, allowing you to integrate with your smart home, watch videos online or bring up recipes on the fly.

Child Locks


Some microwaves will come featured with a child lock to prevent any child-related accidents from occurring. This would typically involve having to press a sequence of buttons before being able to either unlock or operate the microwave.

Energy Safe Mode


Even when not being used, microwaves will still consume a small amount of energy to keep the displays on. If you have a digital display on the microwave, this power usage could be quite high. To compensate this, a lot of newer microwaves will have a ‘power saver’ or ‘energy safe’ mode that either dims or turns off the display when the microwave isn’t being used.

Our Latest Articles

Whether you’re looking to buy new or need help with caring for existing appliances our experts are here to answer your questions with useful guides and articles.

See All Help & Advice

Continue reading