
Author: jacob hanslip

Washing Machine Buyer’s Guide

Washing Machine Buyer’s Guide

If you’re buying a new washing machine, check out our guide on all the features to look out for?

fridge

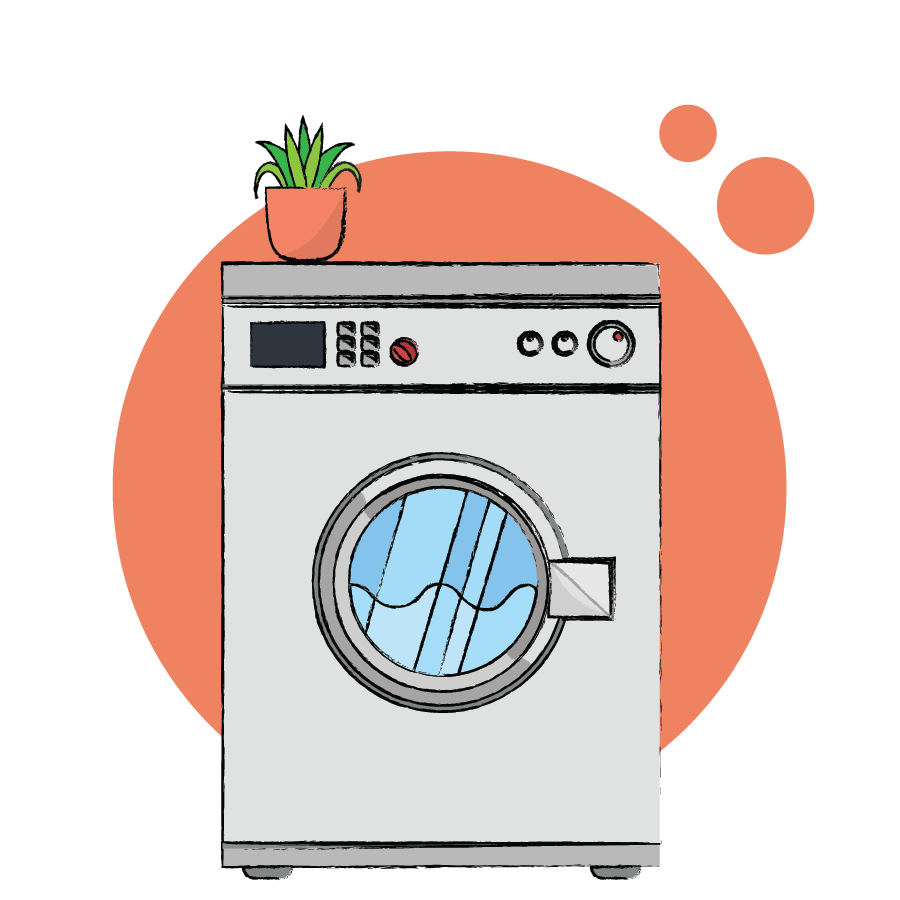
Buying a Washing Machine: All You Need to Know

Your washing machine is so key to your home, it’s really important you get a great replacement when buying a new one. So here is our complete guide on all the features you need to look out for to get the best replacement possible.

Types of Washing Machine


There are a few different types of washing machines: freestanding washing machines, integrated washing machines (built-in), top-loading washing machines, and washer-dryers (a combination of a washer and a dryer).

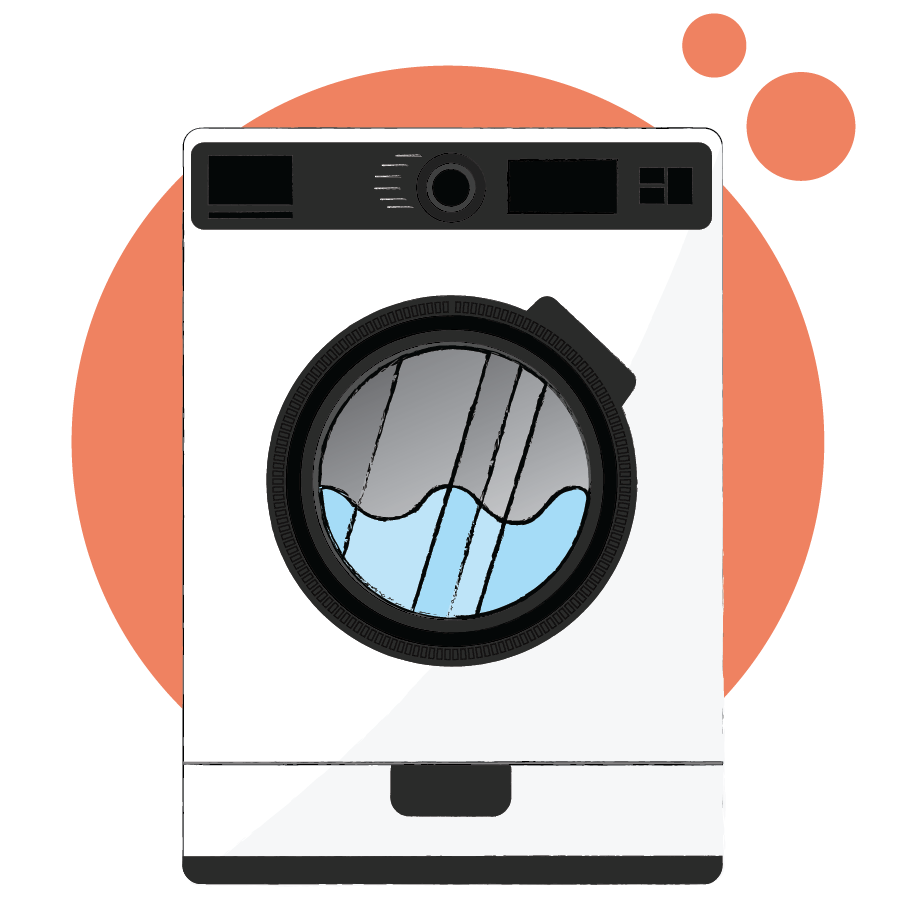
Freestanding Washing Machines


These are the most regularly seen washing machines. They can be plugged in and put anywhere with a plug socket and a drain. They come in various capacities, from 3kg to 12kg.

Pros of freestanding washing machines include a large choice of drum capacities, choice of colours, and lots of features to choose from. Cons include: Unlike integrated models, they don’t blend in with your home.

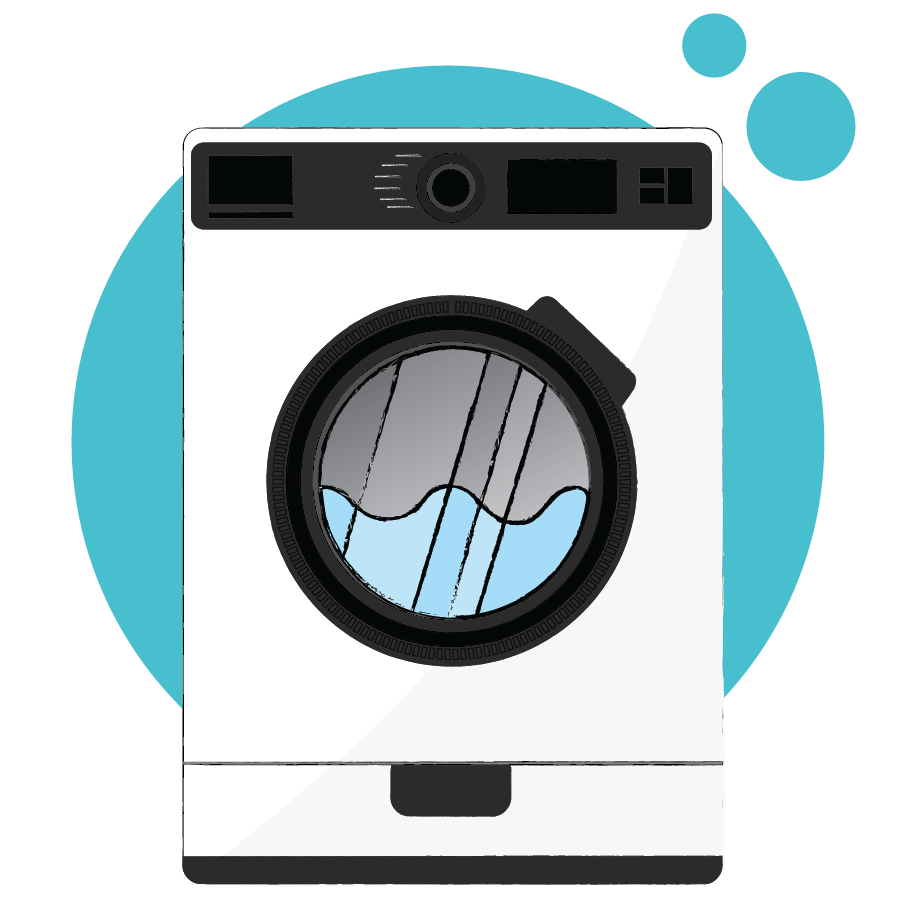
Integrated Washing Machines


Integrated washing machines blend into your home as they’re built in behind your cupboards. They’re also modified to allow for a kitchen plinth to be fitted along the bottom of the appliance.

Outside of a kitchen build, integrated washing machines won’t be as stable, so it’s best to only use it within your kitchen unit as they’re designed to be.

Pros of integrated models are that built in models are usually quieter due to the cupboard door protecting it. They also look nicer when blending into your kitchen unit. Cons of integrated models include that are more expensive to install, usually costing around £80 to install. Freestanding models cost around half as much and some places will only install freestanding models.

Semi-integrated Washing Machines


Semi-integrated washing machines are similar to integrated models, but you can change the settings on your appliance without opening your cupboard door. This is quite a rare type of washing machine.

Top Loading Washing Machines


In top loading models of washing machine, clothes go in at the top through a lid or hatch. They’re not too common in the UK. They aren’t as wide as normal washing machines and of course they need to be out in the open rather than under a worktop, because of the way you open the lid.

They are quite hard to open and unload because the doors are powerfully spring-loaded, and when the cycle finishes you need to spin the drum around to take out your clothes.

Washer Dryers


Washer-dryers are more efficient for space as you only need one machine for two jobs, but unfortunately, most washer dryers are better at one of these jobs than the other. Keep in mind that washer-dryers always have a smaller drying capacity than they do washing capacity.

What Does a Washing Machine Cost to Buy?


A good washing machine can range anywhere from £200-£900. But you’ll not need to spend more than £350 to get yourself something reliable that does the job you’re after.

You’ll encounter quieter, higher-capacity washing machines that allow you to choose more cycle types if you start spending more money, with really expensive machines nearing the £1000 mark.

Can you get a good washing machine for cheap? Absolutely. There are many washing machines from brands like Bosch, Beko, Zanussi, and more that are reliable, have great features, and cost below £350. It is worth researching this though, as many models at this price point certainly don’t justify the £350 spend.

What Does it Cost to Run my Washing Machine?

The costs involved with running a washing machine can vary a lot, depending on the setting you use and how often and what energy rating your model has. On average though, running a washing machine will cost you an extra £34 per year. 

The energy ratings on a washing machine tell you how efficient the machine is at using the water, and the energy powering it. Generally tested on the cotton cycle at 60°C, the ratings go from A+++ (best) to D (worst).


Can I Buy a Sustainable Washing Machine?


Yes you can, buying an efficient washing machine will reduce your environmental impact and also reduce the amount of money you need to spend running it. Be wary though, as many of the most efficient washing machines are weaker at getting your clothes clean, again it is worth doing your research.

Washing Machine Drum Capacities


Usually, the drum capacity of washing machines ranges from 5kg – 12kg. The most frequently purchased sizes are around 9kg and 10kg. The drum size is how many kilograms of clothing you can fit into the drum of the washing machine.

The amount you can put into the washing machine usually changes depending on what type of cycle you set, but the sizes are usually referring to the cotton cycles. Other types of cycles sometimes have as much as half the capacity due to the wash processes involved.

5kg sizes will fit about 7 dry towels in the drum.

9/10kg sizes will fit 13 or 14 dry towels in the drum. 

12kg sizes will fit around 17 dry towels in the drum.

Top Tips on Drum Size: Don’t always go for the largest drum size – just because it’s larger doesn’t mean it performs better. Buy a washing machine with ample room for all your laundry needs. Don’t overfill or underfill your drum, this should optimize for performance. A larger capacity washing machine will be more expensive to run and to buy. If you wash small loads but regularly, go for a smaller drum size, and if you like to do everything in one go, buy a larger capacity drum.

What is the Average Size of a Washing Machine?


The usual standard dimensions of front-loading washing machines are 85cm tall, and 59cm – 60cm wide. The depth of a washing machine can range from 40cm – 70cm (not including 7cm you should leave at the back for pipes unless stated otherwise – check). This is because the spaces they are designed to fit into are generally these dimensions. There are some exceptions though so always read the specifications before you buy – just to be sure.

Different Washing Machine Spin Speeds


Removing water from your clothes at the end of the cycle is an essential part of the washing process and there are various speeds at which this can be done. The highest speeds range from 1000rpm to 1800rpm (rotations per minute). Fast spin speeds can make your washing machine cost more, they can also be louder, and it’s not always better either. The most effective spin speeds tend to be around 1200rpm so it’s not always a good idea to buy a higher speed washing machine.

Popular Brands of Washing Machine


You’re spoiled for choice when it comes to washing machine brands to choose from. Some of the most popular brands are Samsung, Hotpoint, Beko, LG, Bosch and Zanussi washing machines. This is just the tip of the iceberg though; we recommend doing your research and finding one that is just right for you.

Many brands also now give you a selection of colours and options for coloured windows. Popular colours for washing machines include silver, red, grey and black. This can end up costing you more to buy a coloured, stylized machine though.

Our Latest Articles

Whether you’re looking to buy new or need help with caring for existing appliances our experts are here to answer your questions with useful guides and articles.

See All Help & Advice

Continue reading

cooker

Cooker Maintenance Tips

Cooker Maintenance Tips

Our guide to cooker maintenance to extend the life of your appliance. 


How to Keep Your Cooker Well Maintained

Your cooker/oven is one of the most used appliances in your home, which is why keeping it maintained, clean, and in good working order is a great idea. It isn’t a job we look forward to at all, but regular cleaning will improve the consistency of your cooker’s performance and leave it looking and smelling much better in the long run. At the same time, your oven will likely last a lot longer if it’s well looked after! So let’s take a look at some top tips for keeping your cooker well maintained.

01 – Wipe Regularly


As easy as it sounds, wiping down the outside of your oven and anything you can get off of the inside is a great way to keep it looking brand new. You can use oven cleaner (we recommend Oven Pride) or regular surface cleaner depending on how dirty your oven is.

02 – Pyrolytic Self-Cleaning Mode


Many ovens, especially more recently, have started incorporating pyrolytic self-cleaning modes where the is heated to far higher temperatures than used for cooking, in order to clean itself. The extreme heat incinerates the dirt off the walls, leaving you to just sweep up the ash from the bottom of the oven, and it’s clean!

03 – Catch Juice and Gristle with Trays


To prevent further excess dirt and gristle from building up on the floor of the oven, use a tray you can safely keep in the oven to catch dirt and spillages which can easily be removed and washed. This will prevent your oven from building up that greasy thick layer of gristle and keep your oven from smelling so bad.

04 – Use Steam to Loosen Grease


A really easy, cheap, and effective way of getting stubborn grease off of your oven is to use steam. You can fill an ovenproof bowl of hot water and put it in the oven, turn it up to high heat and let the steam from the water loosen all of the greases on the inside – prepping your oven for a super thorough wipe down with oven cleaner.

05 – Be Sure to Clean the Racks


Not only the oven, but the racks your food sits on while cooking get fairly messy too, so keeping them in good shape will help keep your cooker fresh too. They could go in the dishwasher or even just letting them soak in soapy water and then wiping them down will work.

While repairing and reusing your appliance is always the goal, there comes a point where they need to be replaced. We’re happy to help at any stage.

Need To Take Action?

If you own a home appliance, from kitchen gadgets to home tech, our standard Appliance Care Plan helps keep your equipment running smoothly. If you notice any faults, don’t worry with the optional Repair & Care upgrade, we can have an engineer out to you quickly.

Repair tool bag used by appliance engineers for home appliance care, containing essential tools for maintenance and repairs

Our Latest Articles

Whether you’re looking to buy new or need help with caring for existing appliances our experts are here to answer your questions with useful guides and articles.

See All Help & Advice

Continue reading

Cooker Buyer’s Guide

Cooker Buyer’s Guide

If you’re looking to buy a new cooker, check out our article on all the things you need to look out for!

fridge

How to Buy a Cooker: All You Need to Know

Cookers come in all types and sizes, so to help you on your way to buying one just right for you, here’s what to look out for when buying a cooker.

Types of Cooker


It is probably best to look for the type of cooker that matches the energy type you use, to keep energy costs down. Here are the different types of cookers you can have, from electric to dual fuel cookers.

Electric Cookers


The electric cooker has a hob and an oven, both powered by electricity. They will usually have fan ovens too that help cook the food more evenly. Some cookers will have both a fan oven and a regular oven, so you can choose which is best in any given situation.

Electric Induction Cookers


Electric induction cookers use an induction hob that heats the pan directly through magnetic fields, rather than heating the hob. As well as this they have an electric powered oven. This means you’ll need pans made of stainless steel or something based on iron.

Gas Cookers


Gas cookers are the least expensive to use, and gas hobs aren’t as hard to use as electric hobs. Though you may get less consistent results from your cooking with gas cookers compared to electric cookers. Also, a Gas Safe engineer must install the cooker, which may be an extra expense. 

Dual Fuel Cookers


Dual fuel cookers have both an electric oven and a gas hob, meaning you get an easy-to-use hob with the consistency of an electric oven. A Gas Safe registered engineer will have to install one of these ovens too, which may be an extra expense.

Cooker Pricing


The least expensive cookers are gas cookers, as they are usually the simplest option for people who have gas power. They on average cost around £350, so you can pick one up pretty cheap. Other types of cooker and hob are more expensive. For instance, if you’d like an induction hob, you’ll be paying upwards of £400 at least. If you want to go cheap, most of the cheap options have just one oven, if you’d spend a little more then you’ll be able to choose from lots of different features. Still do your research though, some cookers truly can’t justify their price tag. Range cookers are the most expensive type of cooker because they offer a multitude of different cooking styles, they’re much larger and use more fuel. They also tend to be of better build quality overall. Brands like Rangemaster are the best in the business for these types of cookers.

Which Type of Cooker is the Cheapest to Run?


The average annual cost of running your oven depends on the type of oven you have. Here are the UK average costs for all types, as of early 2026: 

Electric Oven: Approx. £31-£86 per year.

Gas Oven: Approx. £21-£48 per year.

Range Cooker: £45-£89 per year.

Slow Cooker: Approx. £11 per year.

Electric Hob/Ring: Approx. £15-£50 per year (depending on frequency of use).

Cooker Features


Automatic Ignition is a great feature to find and is much more convenient when starting your cooking.

A timer is a great feature that makes it much easier to keep track of your meals, especially if you’re busy!

A multi-function oven is a great feature to look out for as it adds so much versatility to your cooking, and gives you ways of cooking you may never have tried before.

Thermostat indicators are always a good shout too to make sure you’re keeping it at the right temperature, and for knowing when the oven is heated up to where you need it.

One more great feature to look out for would be a pyrolytic self-cleaning program. This gets the oven incredibly hot to get rid of spillages that are hardened onto the walls, you just need to sweep the ash away after it’s done.

The Size of your Cooker


Pretty much all of the usual cookers are roughly 60-65cm wide, but if you’re in need of something smaller there are slimmer models available at around 50-55cm. Range cookers and other similar cookers that are built-in can be a lot bigger. They are all around the same height to fit your worktops, at around 80cm high and with a depth of around 60-65cm.

Oven Capacity


You will want to be careful when buying an oven based on the capacity as their measurements include space that isn’t used for cooking. So we always recommend you check specifications and research the capacity further before buying because of this. Also, something worth looking up is the number of oven racks that are given with the cooker as this changes the amount you can cook in there too.

Installing Your Cooker


If you have a gas oven, then you won’t be able to install it yourself as you will need a Gas Safe engineer to install it – this is a legal requirement. Any issues with installation could risk a gas leakage and in turn a fire or explosion. 

If you have an electric oven, it’s probably still best to get an engineer to ensure it is smoothly installed. Not all ovens are plug and play, some need hard wiring, which requires an engineer. However, if your oven doesn’t need hardwiring and just needs plugging into a standard socket, then it couldn’t be easier! Make sure you have a 13 amp (standard) plug socket within 1.5m, then just plug it in and slide into place, and it should be ready to use. If you have any trouble, you can always call a professional to walk you through the steps. 

Our Latest Articles

Whether you’re looking to buy new or need help with caring for existing appliances our experts are here to answer your questions with useful guides and articles.

See All Help & Advice

Continue reading

fridge

Fridge Maintenance Tips

Fridge Maintenance Tips

While repairing and reusing your appliances is always the ultimate goal, there comes the point where they need replacing.

fridge

How to Keep Your Fridge Well Maintained

Your refrigerator is such a key appliance, it is constantly used to keep your food cold and fresh, making it one of the most important appliances in your home. This is why it’s good practice to keep it clean and well maintained to ensure it doesn’t break down and lasts as long as it can before needing to be replaced.

01 – Keep the Coils Clean


The coils in a refrigerator are used to cool and condense the refrigerant that circulates the appliance. If these coils get dirty and clogged with dust etc, they can’t regulate the heat efficiently meaning your refrigerator may overheat and spoil your food. These coils are usually located at the bottom or the back of the appliance.

To remove the dirt and debris from the coils you can use a vacuum cleaner or a stiff brush, or you can purchase a specific coil cleaning brush to get the job done. Just run the vacuum over the coils as thoroughly as you can until free of dust, and with the brush just brush the dirt off and try to get in between all the cracks. This should be done around 2 times a year to make sure there are no issues with the temperature.

02 – Regulate the Temperature


It’s important to keep checking the temperature in your refrigerator as you don’t want your food to go off, and you want to make sure your fridge is running as efficiently as possible. The refrigerator should be running at around 5 degrees celsius. If your fridge doesn’t have a temperature display, you can buy a fridge thermometer really cheap, which will do the trick.

03 – Make Sure the Gasket is Sealing Well


The gasket is the rubber seal around the door that seals the refrigerator shut and keeps it air-tight. If the seal is broken your appliance has to work a lot harder to maintain the right temperature which will use a lot more energy. It’s a good idea to check the gasket every couple of months for signs of wear and tear, and if it is broken you should replace it to ensure your fridge is able to work to its’ full potential.

04 – Change the Filters


Water dispensers and ice machines within fridges tend to have filters that will build up with dirt and residue after a while, and these need changing to keep them functioning properly and keep them clean. your manufacturer will have specific recommendations for how to replace your filters, so look these up and remember to change them regularly for good practice.

05 – Keep the Door Closed


Keeping the door closed on your refrigerator is a great way to make sure your fridge stays efficient and doesn’t overwork itself. When the door is open, you lose cold air really quickly and the temperature can start to rise. This will spoil your food as well as make your appliance work much harder to regulate the temperature.

Keeping the door closed will ensure it is being used correctly and keep it in good condition, as well as keep your food nice and fresh at the right temperature.

06 – Make Sure the Fridge is Level


Your refrigerator might be inhibited if it isn’t level on the ground. It may affect the door and how well it closes, it may affect the circulation of refrigerant, and the motor may have to strain to work properly. Make sure it is level to the ground to get the best performance and if necessary, adjust the feet so it is level.

07 – Keep Food Protected


This will reduce the amount of moisture that gets released by food in your refrigerator, keeping the cleaning you have to do down to a minimum and should make it easier to maintain. When dirt and moisture from food build up in your fridge it can start to smell really bad so keeping your food protected should stop this at least in part.

08 – Don’t Put Hot Food in the Fridge


Hot food in the fridge can actually alter the temperature in the fridge, another thing that makes the appliance work harder than it needs to, to regulate the temperature. This is why it’s a good idea to let your leftover food cool down before placing it in the fridge. It’s also healthier, as food that is going from warm to cold tends to develop more bacteria in less time than it would if it was left to cool down before going in – pro tip!

So that’s our guide on how to maintain your fridge freezer. If you’d like tips on keeping other appliances well maintained, check out our other articles on maintenance.

Need To Take Action?

If you own a home appliance, from kitchen gadgets to home tech, our standard Appliance Care Plan helps keep your equipment running smoothly. If you notice any faults, don’t worry with the optional Repair & Care upgrade, we can have an engineer out to you quickly.

Repair tool bag used by appliance engineers for home appliance care, containing essential tools for maintenance and repairs

Our Latest Articles

Whether you’re looking to buy new or need help with caring for existing appliances our experts are here to answer your questions with useful guides and articles.

See All Help & Advice

Continue reading

stereo / speakers

Stereo Maintenance Tips

Stereo Maintenance Tips

While repairing and reusing your appliances is always the ultimate goal, there comes the point where they need replacing.

sound system

How to Keep Your Sound System Well Maintained

If you have a Hi-Fi sound system or speakers in your home at all, you’ll know the way good audio quality can transform your listening experience and have you floating off to another world on the soundwaves. Over time though, this quality can fade if you don’t keep your speakers well maintained. So here are our top tips for keeping your sound system in good condition.

01 – Keep Dust Away


Dust gets everywhere and ruins everything. Especially electronics. It will get into the wire connectors and stop electrical signals from being perfectly transmitted. This creates static in your speakers which will end up sounding like a crackling.

The measures you can take against dust aren’t expensive or difficult either, so it’s worth getting on top of. You should firstly keep your speakers out of a space that accumulates lots of dust. Then, all you need to do is regularly wipe the speakers down or dust them off. Make sure, however, you don’t use any liquids. This can damage your speakers more. Be sure not to damage the cone drivers or the tweeter too.

02 – Keep Heat Away


Speakers, especially good-quality ones, are very sensitive to heat. You should keep them far out of direct sunlight & windows. They can get damaged quickly in sunlight, especially if they aren’t built to deal with heat exposure. The electromagnetic voice coils can get damaged, which is important for keeping electrical flow between the source and speakers.

03 – Keep Wary of Static Electricity


Another common enemy of speakers is static electricity. When this builds up it can burn your system out. A way to prevent this is to buy some anti-static mats that go on your floor and reduce the static that builds up. A humidifier would be great too as dry air can increase static electricity build-up (be careful not to put it too close to your speakers though).

04 – Keep them Well Ventilated


Ensuring your speakers have a good amount of airflow is important as it helps them keep cool while they are playing which of course gets them hot. People that love speakers will tell you that sometimes you’d even point fans at your speakers to keep them cool while playing loudly. You can also arrange your setup to support proper airflow too by keeping your speakers away from the walls and tight spaces.

Proper airflow doesn’t just improve the likelihood your speaker will survive a bit longer, it also improves the sound quality while playing. So, keeping your air flowing benefits you in more than one way!

05 – Keep Protected Against Surges


More expensive and high-end speakers and sound systems will need you to control how much power flows to them and how it gets power. The speakers won’t usually need a power surge, but the speakers’ amplifier will need protecting. The amplifier is the main hub of your Hi-Fi system, meaning everything is controlled from there. This means all the power flows through your amplifier. If the power was to surge, after returning from a power cut, for example, it could completely fry your amp, leaving you unable to play music for the foreseeable future.

06 – Keep them Protected from Damage


Speakers can be very fragile because of the parts they are made from. The cone drivers and the tweeter on the front where the sound comes out can get damaged easily, if you have small children who like to poke things, or pets who can go crazy at any moment, it’s always a good idea to invest in some speaker protects that keep those important parts nice and safe.

You can get good speaker protects cheap at any Hi-Fi shop or online. This will extend the long life of your speakers and keep your heart at ease when the pets and kids are playing and dancing to the music!

Accessories and Equipment to Keep Your Speakers in Great Shape


As well as general tips you can use to keep your Hi-Fi speakers in good condition, there are some accessories and odd bits you can buy to enhance your listening experience.

  • One of our first picks is tall speaker stands to keep your speakers out of the way from dust, keep the airflow good, and to make sure the playing quality isn’t interrupted.
  • Another useful tip is this speaker cleaning set from Betron. Keep your speaker dust free in all its’ nooks & crannies!
  • A cheap and easy accessory that is essential is a spare AUX cable. This means if yours ever gets damaged you can carry on playing your music straight away!
  • If you have a capable sound system, then a home assistant that connects to your sound system like an Alexa or Google Assistant can really elevate your listening experience, you wouldn’t have to touch your sound system to control it! 

If Your Speakers Need Extra Protection

If your speakers need some extra protection, if they are your prized possessions, if you know you can’t risk going a day without your music, then Zest can provide the service you need. Our comprehensive sound system and speaker protection protect you for wear & tear, and breakdowns, with no upper claims limit. So it doesn’t matter how fancy your sound system is – we’ll protect it. Find out more at the links below, but for now, have fun keeping your speakers in great condition.

Need To Take Action?

If you own a home appliance, from kitchen gadgets to home tech, our standard Appliance Care Plan helps keep your equipment running smoothly. If you notice any faults, don’t worry with the optional Repair & Care upgrade, we can have an engineer out to you quickly.

Repair tool bag used by appliance engineers for home appliance care, containing essential tools for maintenance and repairs

Our Latest Articles

Whether you’re looking to buy new or need help with caring for existing appliances our experts are here to answer your questions with useful guides and articles.

See All Help & Advice

Continue reading

Common Fridge Freezer Faults

Common Fridge Freezer Faults

Read out article to help you stay vigilant for the most common fridge freezer faults!

fridge

Common Fridge Freezer Faults

Fridge freezers are an essential appliance in most kitchens, and when they malfunction, it can be frustrating. In this guide, we’ve outlined some of the most common fridge freezer faults and provided solutions to help you resolve them quickly and efficiently.

Freezer isn’t Freezing Food Properly


When your freezer stops freezing properly, it can cause chaos, including wasted food and water leaks. The first step is to check the temperature around the appliance. If the surrounding temperature is below 10°C, it can affect the fridge and cause freezer issues. Additionally, make sure the freezer fan is clear of any obstructions, such as ice buildup, and check the door seals. If the seals are damaged or dirty, they may prevent the door from closing correctly, affecting the freezing process.

Door Seals Aren’t Working


Faulty door seals are a common issue that can affect both the fridge and freezer. A poor seal can cause food to spoil faster and prevent freezing. If you suspect a problem with the door seals, start by checking for food debris or a loose corner that may prevent a proper seal. To test the seal, place a £10 note against the door seal and close it. If the note stays in place, the seal is working. If it slips, the seal needs replacing. New seals cost between £30 to £80 and can be easily replaced by yourself.

Fridge is Too Warm


A warm fridge is a recipe for food spoilage, as bacteria grow more rapidly in warmer temperatures. First, ensure that the surrounding temperature is not lower than 10°C, as this can affect the fridge’s performance. Next, check for overcrowding inside the fridge. If the fridge is too full, cold air cannot circulate, creating a warmer environment. Finally, the thermostat may be malfunctioning. If so, it’s recommended to call a professional to replace it to avoid further issues.

The Light Won’t Turn On


If the fridge light isn’t turning on, start by checking for any obstructions, such as ice or debris, that may be blocking the light switch. If nothing appears to be blocking it, the lightbulb may be faulty. Replacing a standard screw-in lightbulb is a simple fix, and new bulbs can be purchased online using the appliance’s model number. However, if your fridge uses LED strip lights, it’s best to consult a professional, as they can be more challenging to replace.

Conclusion


Fridge freezers are an essential part of every kitchen, and when they stop working properly, it can be frustrating. By understanding these common faults and troubleshooting them, you can often save yourself time and money. If you’re unsure or need further assistance, always consult a professional to ensure your appliance runs smoothly.

Need To Take Action?

If you own a home appliance, from kitchen gadgets to home tech, our standard Appliance Care Plan helps keep your equipment running smoothly. If you notice any faults, don’t worry with the optional Repair & Care upgrade, we can have an engineer out to you quickly.

Repair tool bag used by appliance engineers for home appliance care, containing essential tools for maintenance and repairs

Our Latest Articles

Whether you’re looking to buy new or need help with caring for existing appliances our experts are here to answer your questions with useful guides and articles.

See All Help & Advice

Continue reading

television

Television Maintenance Tips

TV Maintenance Tips

While repairing and reusing your appliances is always the ultimate goal, there comes the point where they need replacing.

tv

How to Keep Your Television Well Maintained

Your TV is one of your most prized items of technology, I’m sure. Therefore it’s important for you to keep it in good condition for long life, saving you money on repairs and even buying a new one too soon. From power surges to dust build-up, here are our top tips for keeping your TV well maintained.

Whether it is screen burn or overloading the circuits with too much power, check out how you can keep your TV safe and sound with our TV maintenance tips.

01 – Turn It Off When Not Using It


Most TVs stop working at around 65,000 hours of usage, meaning if your TV is on when you’re not watching it or while you’re asleep, you will run down its lifespan. If you’re constantly turning your TV off when it isn’t being used you will get many more hours of viewing out of it, so it’s a great idea to be responsible and turn it off when it isn’t in use or when you don’t need to have it on. Not to mention this will save you money on electricity too!

02 – Use a Surge Protector Plug Socket


It’s possible that your electricity could give you a voltage surge that damages the electrics by overloading your TVs circuits. This can happen when there are power cuts and when the power comes back, and even in bad weather like a storm. A surge protector plug socket will regulate the voltage going into the TV through the plug at any one time and therefore keep your TV protected from power surges, giving it a higher chance of lasting longer.

03 – Find the Right Brightness Level


The brightness of your TV can also affect the lifespan of your TV. If you have your TV on the highest brightness setting or near the highest setting all the time, it’s equivalent to you running fast and trying to maintain it for a long distance. You’re going to get tired out eventually, and so is your TV. Keep your brightness at a moderate level and you’ll help your TV live longer, and you’ll help your eyes, as bright blue light from your TV can also damage your eyes in the long term.

04 – Allow Your TV Space for Ventilation


Even though TVs are getting thinner and thinner nowadays, you’d be surprised at how hot they can get. TVs still need a good amount of room for good airflow and ventilation to keep it from overheating, as they use a lot of electricity. So, find an open space where the air isn’t too thick, and your TV shouldn’t get too hot to handle, meaning it will live for longer.

Replacing may sound like an expensive option, but with the oven becoming more expensive to run as it gets older, poorer at cooking and in general worse for wear condition, a new one is likely going to be the most economical option for you.

05 – Use the Right Level of Contrast


High contrast levels on your TV can also cause your machine’s lifespan to decrease. The quality of the display may decrease as your TV needs to work harder and use more processing power to provide a constantly high contrast display. To be safe, find a moderate level of contrast that is a good middle ground for your TV and your viewing experience, and stick to it.

06 – No Sharp Objects


Sharp objects like scissors, sharp toys or pencils, and pens are all hazards to the TV, they can cause permanent damage to the display of your TV, destroying areas of pixels. This can be worse on modern TVs as the screens are much more delicate and the TVs are thinner in general. Keep sharp objects away from your TV and prevent permanent damage to your screen. Expensive option, but with the oven becoming more expensive to run as it gets older, poorer at cooking and in general worse for wear condition, a new one is likely going to be the most economical option for you.

07 – Give Your TV a Clean


There are lots of cleaning products for TVs, and this isn’t an area you want to skimp on. Good quality TV cleaning essentials are a must, as they help get rid of dust, and stains that affect the visibility of the display. It’s also a terrible idea to use water to clean the display, only ever buy actual screen cleaners with anti-static protection too, if possible, as it keeps your TV set safe while you go about cleaning it. We recommend the Pledge Electronics screen cleaning wipes.

08 – Dust it Regularly


Dust is a TV’s worst enemy. It is destructive to a TV’s health and lifespan, and it can get both on and in your TV. It can slow it down, break it completely, or even cause it to overheat easier than it would otherwise. A great accessory to look at getting for your TV upkeep would be an electronic vacuum pump that can get all the dust out of your TV and stop build-up before it gets too bad and affects your TV’s performance.

09 – Don’t Leave it On for Too Long


If you leave your TV on for a long time, sometimes images that are left displaying for too long can leave what’s called a “burn-in”. This is where the image is displayed on the TV is left in the pixels for too long, causing them to overheat and leave a mark on the screen in the shape or imprint of what was being displayed. This is bad for your display and will hurt your viewing experience if it keeps happening, so to be safe, don’t keep your TV on for too long at once, especially not if you’re showing a screensaver or photos, etc.

10 – Keep the Room From Being Too Cold


Cold temperatures in the room that your TV is in can cause condensation that gets into your TV through small cracks and can damage the vital parts of the machine. It could get so bad that your TV just breaks and doesn’t work due to water damage, so it is best not to use your TV if the room is absolutely freezing. Warm it up first!

Need To Take Action?

If you own a home appliance, from kitchen gadgets to home tech, our standard Appliance Care Plan helps keep your equipment running smoothly. If you notice any faults, don’t worry with the optional Repair & Care upgrade, we can have an engineer out to you quickly.

Repair tool bag used by appliance engineers for home appliance care, containing essential tools for maintenance and repairs

Our Latest Articles

Whether you’re looking to buy new or need help with caring for existing appliances our experts are here to answer your questions with useful guides and articles.

See All Help & Advice

Continue reading

Common Dishwasher Faults

Common Dishwasher Faults

Your dishwasher is really important. This article is to help you recognise common faults, should it break down.

fridge

Common Dishwasher Faults

Dishwashers have been an invaluable home appliance for a number of years, saving time and hassle especially with large families or hobby chefs. More often than not, dishwashers will last a good 10 years without breaking down, but some can develop faults earlier. When your dishwasher goes wrong, it can be a stressful experience, especially if it doesn’t have a digital display to give a fault code, so we’ve curated some of our top tips for diagnosing and troubleshooting common dishwasher faults in this article:

01. Leaks


Clogged Filter

The single largest cause of dishwasher leaks is a clogged dishwasher filter. This usually exists at the centre of the bottom of the dishwasher and can be pulled out quite easily. It’s designed to catch small pieces of food or grit and stop them from exiting through the waste pipe. Once you have removed the dishwasher filter, remove any blockages from it and rinse it under the kitchen tap. We would recommend that your dishwasher filter is cleaned once a month to help prevent any build-up.

Failed Door Seal

If the water is leaking from the front of the dishwasher onto your kitchen floor, this could be due to a broken door seal. Open the door of the dishwasher and run your fingertip along the seal to check if it has been worn, chipped, pulled away or warped. When the vinyl or rubber of a dishwasher door deal deteriorates, they cannot form an effective seal around the door to keep water on the inside of the machine. If the seal has deteriorated, you may need to order a new part from the manufacturer.

02. Not Draining


Clogged Filter

The first thing to look at here is the potential of a clogged filter (see ‘clogged filter’ in the leaks section for tips on how to fix this).

Blocked or Bent Pipes

If it’s not the filter, then consider taking a look at the waste exit pipe of the dishwasher. There could be a blockage within the pipe restricting the flow of water leaving the machine. Also check for kinks or bends in the pipe which could be doing the same. If this is the case and the pipe is blocked, we would recommend turning off the mains water in your home and unclipping the pipe. Once it’s off, you should be able to look down it to see if there any blockages. If not, run it under water and check that water is freely flowing through it.

03. Not Filling


If your dishes are coming out exactly as they went in (likely dirty and dry), then your dishwasher is not filling with water. The first thing to check is your water stop valve in the home – make sure this is fully open and supplying water. If it’s not, you may need to call a plumber to check – there’s a chance that it could be clogged up with debris and need clearing out.

The second part of the dishwasher to investigate if the machine isn’t filling are the spray arms. These are the spinning parts inside the dishwasher that are full of small holes (they look similar to octopus tentacles!). If you’re in a particularly hard water area, limescale deposits can build up on the water holes, much like with a shower head. If this is the case, it’s best to give them a good scrub – using lemon juice or vinegar can help shift some of the limescale deposits if you’re having a particularly hard time.

Lastly, the water inlet valve could be the culprit here. Check behind the machine to ensure that there are no kinks or bends in the pipework that could be restricting the flow of water into the machine.

04. Not Taking Detergent / Tablet


A complete wash cycle should use up one complete dishwasher tablet and some of the rinse aid in the reservoir. If you’re opening up the tablet flap and there’s still a large amount of the tablet remaining, then it’s likely that the water supply is the issue here. Either there is an issue with the pressure of the water coming into the machine being too low or there is no water coming in entirely. Much like the issue above for ‘not filling’, make sure to check the pipework behind the machine for kinks and bends that could limit the inbound water pressure to the dishwasher.

05. Water is Cold


Hot Water Supply

If the water inside of the dishwasher is coming out cold, the first thing to check is your home hot water system. Run the hot tap for at least 2 minutes to test if there is hot water being supplied in your home. If the water is cold or warm, turn up the dial on your boiler or hot water heating system.

Faulty Thermostat or Heating Element

If there is hot water being supplied in your home, then there’s a good chance that there is a fault with the dishwasher itself. Most often with this issue, the culprit will be a faulty heating element or thermostat that will need to be replaced by a qualified repair expert.

06. Excessive Noise or Shaking


If your dishwasher is making a lot of noise whilst the cycle is running, then there could either be loose objects that have fallen away from the racks inside or a loose/broken internal part. When the dishwasher is off and has cooled down, empty any plates & cutlery and look around the bottom of the appliance for any large debris or small cutlery as this is usually the problem.

Excessive noise can also be attributed to the appliance not being level. You may need to rest a spirit level on top of the dishwasher to check this and if it is not level, simply adjust the feet at the bottom of the appliance until it sits level on the floor.

07. No Power


Check the Door is Closed and the Water is On

First of all, check that the dishwasher isn’t powering on because of a user error. A lot of dishwashers won’t start a wash cycle until the door is closed properly and the sensor on the dishwasher recognises that there is a seal before starting a wash. Some dishwashers will also not start a cycle until it recognises that there is an inbound flow of water to the machine.

Blown Fuses

The second thing to check if your dishwasher has no power are the fuses. The first fuse is within the plug of the dishwasher itself. The other potential tripped fuse in the home can be found in your homes fuse box. Check for one of the switches on the fuse box to be flipped the inverse way to the others and simply flick it back.

Damaged Electrical Socket

Sometimes the culprit for a dishwasher not turning on can be the electrical socket that the appliance is plugged into. If this is the case, we would recommend contacting a qualified electrician to resolve the issue.

08. Dishwasher Smells


If your dishwasher is starting to smell, there are three internal parts that can be cleaned – the filter, the rubber seals and the spray arms. 

This should help you troubleshoot and understand what’s wrong with your dishwasher. If you need more assistance, we recommend you see a professional. 

Need To Take Action?

If you own a home appliance, from kitchen gadgets to home tech, our standard Appliance Care Plan helps keep your equipment running smoothly. If you notice any faults, don’t worry with the optional Repair & Care upgrade, we can have an engineer out to you quickly.

Repair tool bag used by appliance engineers for home appliance care, containing essential tools for maintenance and repairs

Our Latest Articles

Whether you’re looking to buy new or need help with caring for existing appliances our experts are here to answer your questions with useful guides and articles.

See All Help & Advice

Continue reading

Samsung Tumble Dryer Error Codes

Samsung Tumble Dryer Error Codes

A Guide To Understanding Samsung Tumble Dryer Error Codes And Solutions

We know how important it is to keep your tumble dryer running smoothly, especially when it’s a premium brand like Samsung where replacement parts can come at a high cost. If an error code appears, use our complete list of Samsung error codes to help diagnose the issue. If you need further expert advice, Zest’s Helpdesk team is always here to support you with all your home appliances.

Take a look at our appliance care page to learn more about our care plans – designed to give you peace of mind and expert support whenever you need it.

tumble dryer (2)

Error Code Solution Description
dC, dE Close the door and start again. Make sure no laundry is caught in the door. Check if the Child Lock is on. If the Child lock is on, you may get this message when you open the door even though the dryer is not operating. If this code remains, contact us about our Repair & Care option if your appliance is broken.

Door is open.

NC, NC1 Check the lint filter assembly. If this code remains, contact us about our Repair & Care option if your appliance is broken.

Lint filter problem.

NC2 Check internal heat exchanger cover assembly. If this code remains, contact us about our Repair & Care option if your appliance is broken.

Internal heat exchange cover problem.

5C, 5E Make sure that the draining hose is not bent or damaged. If the hose is frozen, wrap the hose with a towel soaked in warm water for approximately 10 minutes to thaw the hose. Empty the water tank, turn on the dryer and start again. If this code remains, contact us about our Repair & Care option if your appliance is broken.

Draining malfunction, draining pump malfunction, frozen draining hose, or water tank full.

tC, tE Clean the lint filter or the heat exchanger. Check for a clogged lint screen. Check if the vent system is restricted. If the code remains, contact us about our Repair & Care option if your appliance is broken.

Air temperature sensor problem.

tC5, tE5 Turn power off. Wait 2 or 3 minutes. Turn power back on and start again. Check for a clogged lint screen. Check if the vent system is restricted. If the code remains, contact us about our Repair & Care option if your appliance is broken.

Compressor temperature sensor problem.

FIL + tEr Clean the heat exchanger. If the code remains, contact us about our Repair & Care option if your appliance is broken.

Heat exchanger needs to be cleaned.

3C, 3E Try restarting the cycle. If this code remains, contact us about our Repair & Care option if your appliance is broken.

Check the inverter motor operation.

AC, AE Contact us about our Repair & Care option if your appliance is broken.

Electronic control problem (invalid communication).

AC6, AE6 Try restarting the cycle. If the code remains, contact us about our Repair & Care option if your appliance is broken.

Check the communications between the main and the inverter PBAs.

FC, FE Try restarting the cycle. If the code remains, contact us about our Repair & Care option if your appliance is broken.

Invalid power source frequency.

9C1/9E1/9C2/9E2 check if the power is supplied properly. Check if the power cord is plugged in. If the code remains, contact us about our Repair & Care option if your appliance is broken.

The electronic control needs to be checked.

dF Unplug the dryer and check for loose or damaged wiring connections in the door/lock switch circuit. It may be necessary to replace the entire door lock/switch. If so, contact us about our Repair & Care option if your appliance is broken.

Incorrect door switch.

Need To Take Action?

If you own a home appliance, from kitchen gadgets to home tech, our standard Appliance Care Plan helps keep your equipment running smoothly. If you notice any faults, don’t worry with the optional Repair & Care upgrade, we can have an engineer out to you quickly.

toolbox

Our Latest Articles

Whether you’re looking to buy new or need help with caring for existing appliances our experts are here to answer your questions with useful guides and articles.

See All Help & Advice

Continue reading

washing machine

Samsung Washing Machine Error Codes

Samsung Washing Machine Error Codes

A Guide To Understanding Samsung Washing Machine Error Codes And Solutions

We know how important it is to keep your Samsung washing machine running smoothly, especially where replacement parts can come at a high cost. If an error code appears, use our complete list of Samsung error codes to help diagnose the issue. If you need further expert advice, Zest’s Helpdesk team is always here to support you with all your home appliances.

Take a look at our appliance care page to learn more about our care plans – designed to give you peace of mind and expert support whenever you need it.

blog pages artwork 27

Error Code Solution Description
1C/1E Switch off the appliance at the mains then wait 1 minute before restarting. If the issue persists, we recommend seeking professional advice. Contact us about our Repair & Care option if your appliance is broken.
  • Sensor malfunction
  • Clogs or blockages
  • Overloading
3C/3E/3E1/3E2/3E3/3E4 We recommend seeking professional advice. Contact us about our Repair & Care option if your appliance is broken.
  • Overloading
  • Worn motor brushes
  • Power supply issues
3CP We recommend seeking professional advice. Contact us about our Repair & Care option.
  • Power supply issues.
  • Faulty control board
4C/4E We recommend seeking professional advice. Contact us about our Repair & Care option if your appliance is broken.
  • Water supply valve
  • Kinked or damaged hoses.
4C2, 4E1, 4E2, 4Ed We recommend seeking professional advice, contact us for our Repair & Care options if your appliance is broken.
  • Faulty water inlet valve
  • Faulty temperature sensor
  • Clogged filter
5C, 5E We recommend seeking professional advice, contact us about our Repair & Care option if your appliance is broken.
  • Clogged drain hose
  • Clogged filter
  • Faulty drain pump
6E We recommend seeking professional advice. Contact us about our Repair & Care option if your appliance is broken.
  • Faulty water heater
  • Sediment buildup
8C Switch off the appliance at the mains and then wait 1 minute before restarting. If the issue persists we recommend seeking professional advice. Contact us about our Repair & Care option if your appliance is broken.
  • Overloading 
  • Unbalanced load
  • Faulty motor
9E1, 9E2, 9H1 We recommend seeking professional advice. Contact us about our Repair & Care option if your appliance is broken.
  • Electrical issues
  • Faulty control board
  • Loose connections
11E We recommend seeking professional advice. Contact us about our Repair & Care option if your appliance is broken.
  • Water supply issues
  • Clogged inlet screens
  • Faulty water valve
12E We recommend seeking professional advice. Contact us about our Repair & Care option if your appliance is broken.
  • Physical damage
  • Moisture or water damage
13E We recommend seeking professional advice. Contact us about our Repair & Care option if your appliance is broken.
  • Faulty connections
  • Electrical issues
  • Software glitches
E11 Check if Super Cool mode is activated. Set the fridge temperature to a higher value. Check if vents are clear and not clogged. Contact us about our Repair & Care option if your appliance is broken.

The fridge compartment is too cold.

AC6/AC/AE We recommend seeking professional advice, contact us about our Repair & Care option if your appliance is broken.
  • Faulty connections
  • Electrical issues
  • Software glitches
bE1/bE2/bE3 We recommend seeking professional advice, contact us about our Repair & Care option if your appliance is broken.
  • Physical damage
  • Moisture or water damage
CE We recommend seeking professional advice, contact us about our Repair & Care option if your appliance is broken.
  • Faulty water inlet valve
  • Faulty temperature sensor
  • Clogged filter
dC/DC/DC1/dE/dE1 Check for any obstructions in the door. If the issue persists, contact us about our Repair & Care option if your appliance is broken.
  • Obstructions
  • Faulty part
E1 We recommend seeking professional advice, contact us about our Repair & Care option if your appliance is broken.
  • Water supply valve
  • Kinked or damaged hoses
E2 We recommend seeking professional advice, contact us about our Repair & Care option if your appliance is broken.
  • Clogged drain hose
  • Clogged filter
  • Faulty drain pump
E3/OC/OE/OF We recommend seeking professional advice, contact us about our Repair & Care option if your appliance is broken.
  • Clogged or damaged drain pump
  • Faulty water level system
E5/E6/HE1 We recommend seeking professional advice, contact us about our Repair & Care option if your appliance is broken.
  • Faulty water heater
  • Sediment build up
E7 Switch off the appliance at the mains and wait for 1 minute before restarting. If the issue persists, We recommend seeking professional advice. Contact us about our Repair & Care option if your appliance is broken.
  • Sensor malfunction
  • Clogs or blockages
  • Overloading
E8/H1/HC/HE We recommend seeking professional advice, contact us about our Repair & Care option if your appliance is broken.
  • Faulty water inlet valve
  • Faulty temperature sensor
  • Clogged filter
E9 We recommend seeking professional advice, contact us about our Repair & Care option if your appliance is broken.
  • Water supply issues
  • Clogged inlet screens
  • Faulty water valve
EA/EB We recommend seeking professional advice, contact us about our Repair & Care option if your appliance is broken.
  • Overloading
  • Worn motor brushes
  • Power supply issues
FE We recommend seeking professional advice, contact us about our Repair & Care option if your appliance is broken.
  • Malfunctioning motor
  • Malfunctioning control board
  • Clogged or dirty filter
LC/LC1/LE/LE1 We recommend seeking professional advice, contact us about our Repair & Care option if your appliance is broken.
  • Clogged water inlet valve
  • Faulty water level sensor
  • Malfunctioning water pump

Need To Take Action?

If you own a home appliance, from kitchen gadgets to home tech, our standard Appliance Care Plan helps keep your equipment running smoothly. If you notice any faults, don’t worry with the optional Repair & Care upgrade, we can have an engineer out to you quickly.

toolbox

Our Latest Articles

Whether you’re looking to buy new or need help with caring for existing appliances our experts are here to answer your questions with useful guides and articles.

See All Help & Advice

Continue reading